Monday, 30 September 2013

A good time was had by all!

I thought today I would show you the projects we made on Saturday at Grafton Crafts in Kimbolton.


I think "a good time was had by all". We were made very welcome by Jenny and Yvonne and the ladies on the workshop did a really good job.

Here is a picture of their finished Christmas cards.


We used the Spellbinders Layered Poinsettia die set with the Heartfelt Creations stamp set called Petite Poinsettia designed to match the die. The embossing folder we used was the Spellbinders M-Bossabilities folder called Holiday Magic. 

We are 4 followers away from 100 now, so I hope to be able to send out the blog candy soon.

Happy crafting!

Monday, 23 September 2013

Gilded Love Heart

Today's  card is a fairly simple card to make.


It uses the Cosmic Shimmer Gilding Flakes and the Creative Expressions Damask Heart with Love sentiment stamp from the Singles range of stamps. These are already mounted onto cushion and cut out ready for use. 

The images were stamped onto a piece of black card using the Cosmic Shimmer Flake & Glitter Glue, which had been soaked into a small piece of cut n dry foam. The gilding flakes were then applied, using a stencil brush to remove any excess pieces. 

This was then die cut using the Spellbinders 5 x 7 Elegant Labels Four die set.

Finally, a mat of gold card was placed behind the die cut layer.

Happy crafting!


Wednesday, 18 September 2013

Vintage Photo Keychain

Made using products supplied by Creative Expressions.


Happy crafting!

Sunday, 15 September 2013

Keyrings

One for him and one for her maybe?

Another project from my Melt Pot.


Happy crafting!


Thursday, 12 September 2013

Monday, 9 September 2013

Something a bit different!

I am going to be away for a couple of weeks, so thought I would schedule a few posts in my absence, showing some other artwork that you might be interested in.

If anyone would like any more details, please leave your comment and I will get back to you when I return.


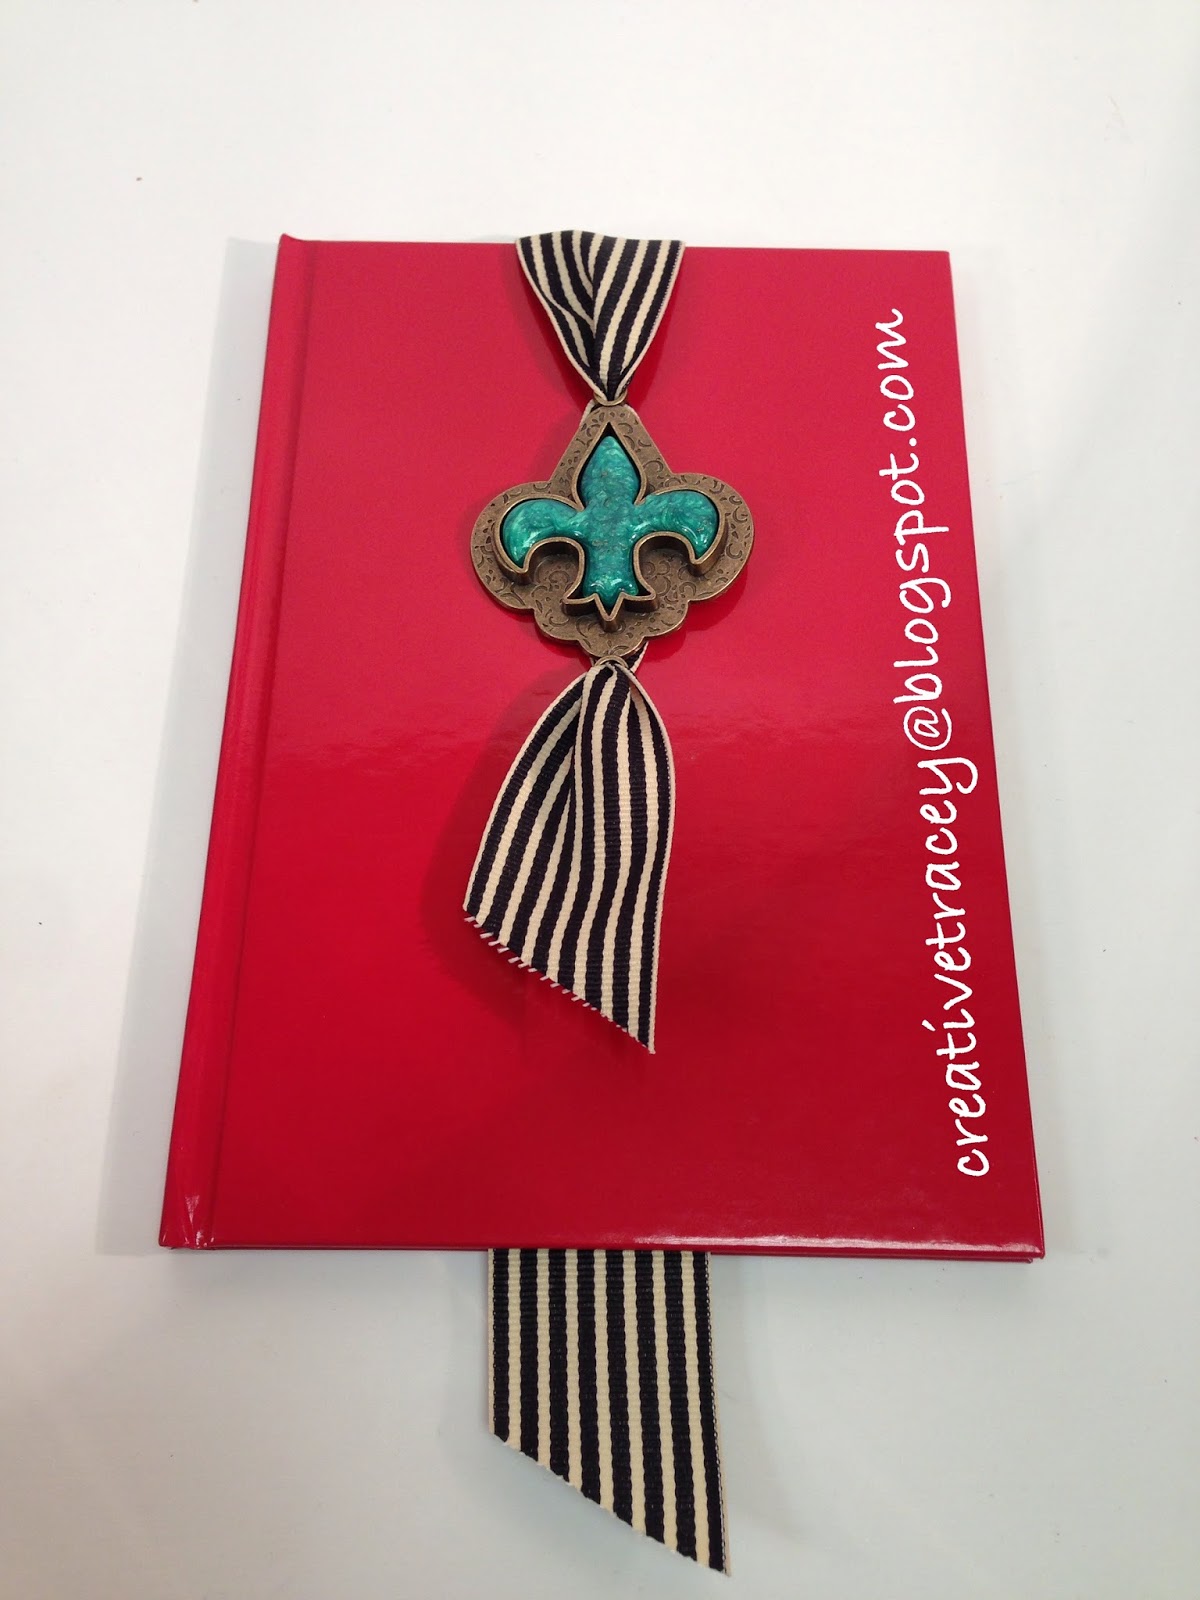
This is a bookmark I made when I got my new Melt Pot.


More items to follow soon . . . 

Happy crafting!

Tuesday, 3 September 2013

Elegant Friend

A simple, but elegant card today, using the Spellbinders Elegant Labels Four die set, with white card and teal card. 


The sentiment and frame have been stamped in Peacock Feathers Distress Ink. The frame is called Floral Scroll and is from the Creative Expressions range of Stamps To Die For. The sentiment comes from the Creative Expressions Special Sentiments A5 Stamp Plate.

The ribbon is Creative Expressions White Sheer Wrinkled Edge Ribbon and has been topped with a square dazzler.

Happy crafting!

Sunday, 1 September 2013

A Pot of Orange Blooms

This card was made using the Spellbinders Layered Flowers die set and their Flower Pots die set.


I used a piece of double sided paper from the Tim Holtz Idea-ology Holiday Past Paper Stash pad for the flower pot, so when the top was folded down there was a contrasting but still co-ordinating pattern of stripes. I am sure the leafy swirls were die cut using a Spellbinders die set (does anyone know which one?). The message was die cut using a die from the Spellbinders Nautical Frames & Accents die set and tied around the flower pot using a piece of twine. The background was embossed using the Spellbinders M-Bossabilities folder called Garden Lattice. 

Happy Crafting!

Friday, 30 August 2013

Gilded Tulips

This card features the Cosmic Shimmer Gilding Flakes. There are lots of lovely colours to choose from (I think this uses Egyptian Gold).


The tulip image is from the Creative Expressions Floral Silhouette A5 Stamp Plate. I used a piece of Cut and Dry foam with the Cosmic Shimmer Flake & Glitter Glue to "ink" my stamp. I then used a stencil brush to clean away any excess flakes. 


The stamped image was die cut using the Spellbinders Elegant Labels Four die set and I added a bow from Creative Expressions Champagne Sheer Wrinkled Edge Ribbon, with a brown dazzler in the centre. 

I cut a frame from gold card and layered these pieces onto a larger mat of milk card.

To finish, I added a few self-adhesive black pearls, as shown.

Happy crafting!


Wednesday, 28 August 2013

Skater Tags

A card for a teenager today! I have two sons who have both spent quite a few hours skateboarding, so this card makes me think of them.


I decided to use red, white and blue as the colour theme and cut three tag shapes. The blue tag was stamped using one of the stamps from the Creative Expressions Anything Is Possible A5 Stamp Plate and black ink. 

The red tag was embossed using the Creative Expressions Crackle Embossing Folder. The embossing was then sanded back and blue ink blended over the tag. Metal wings from the Tim Holtz Idea-ology Adornment Charms pack were glued to the corner. 

The white tag was stamped using an image from the Anything is Possible Stamp Plate and the message. Blue ink was then blended around the outside edges. 

The three tags were fixed together using a swivel clasp. The metal crown and the metal star came from the Idea-ology Adornment Charms pack.

The background was made using two shades of blue ink and the large stamp from the Creative Expressions Silhouette Skateboards A5 Stamp Plate.

Happy crafting!


Monday, 26 August 2013

A single rose

A very feminine card today. The stamp is from the Creative Expressions Singles range and is called Classic Rose Stem. It comes with the Best of Luck message and both stamps are pre-cut and cushion mounted, ready to start stamping. 


I stamped the rose using a Black Archival Ink Pad on some white card and then heat embossed using Cosmic Shimmer Detail Clear Embossing Powder. As this ink is not particularly designed for heat embossing you need to get the powder on quickly, before the ink starts to dry. It is not difficult, you just need to have everything in front of you ready to go. I coloured the rose image using Distress Markers. I then die cut the stamped image using a die from the Spellbinders Timeless Rectangle die set. Whilst the die cut card was still in the die, I blended Distress Ink around the edges.

The next layer of white card was embossed using the Couture Creations Crazy Daisy embossing folder and then die cut using the Spellbinders Elegant Labels Four die set. I then blended ink through the die. A matching size mat of blush pink card was placed behind, so that the pale pink showed through the gaps. 

The message was stamped in the same way as the rose and then die cut using the ribbon slider die from the Elegant Labels Four die set.

The ribbon I used was the Creative Expressions Rose/Dusky Pink Sheer Wrinkled Edge Ribbon and the base layer was a plain white piece of card.

Happy crafting!

Saturday, 24 August 2013

Turquoise Baubles

Today's card uses two of the new bauble stamp designs from Creative Expressions, which co-ordinate with existing Spellbinders die sets. This design is called Floral Bauble and Mini Floret Bauble.


The base card is a plain black square. I then cut a slightly smaller square in a pretty blue shade, which I embossed using the Couture Creations Baubles & Baubles embossing folder. I extended the pattern so that the card was embossed all the way along the top edge. The folder didn't reach the bottom edge of the card but this was covered over by the next layer of white card anyway. 

The white piece of card was cut along the top edge using the Spellbinders A2 Curved Border One die set. As the card was slightly wider than the length of the die, I extended the cut slightly. 

The ribbon tied around the white card layer is Creative Expressions White Sheer Wrinkle Edge Ribbon, topped with a circle dazzler. 

The sentiment message was stamped using a Black Archival Ink Pad and a stamp from the Creative Expressions Winter Greetings A5 Stamp Plate. 

The three baubles were stamped using a Clear Perfect Medium Pad on matching blue card and then heat embossed with Cosmic Shimmer Detail Silver Shine Embossing Powder. The stamped baubles were die cut using the matching sized dies from the Spellbinders 2011 Heirloom Ornaments die set. The baubles were then shaped to give them a rounded shape and threaded together with a piece of black and white Bakers Twine. The baubles were attached using a few foam pads stacked on top of each other, to keep the height in the centres. 

Happy crafting!

Wednesday, 21 August 2013

Shoes and Friends!

Today's card uses Foundations backing papers and the Creative Expressions stamp set "Sole Creations". I don't use decorative papers very often but after I had coloured in the stamped shoe image the papers were a really good colour match. The papers are double sided, so I used one side for the background and the reverse side for the panels.


I added some black card, die cut using the Spellbinders Antique Frame & Accents set.


The stamped image was die cut using the Spellbinders Labels Six die set, which I turned on its side to fit the image.

I am off to Grafton Crafts today in Kimbolton, to hold a workshop, and am really looking forward to meeting everyone.

Happy crafting!

Monday, 19 August 2013

A trio of carnations

Hello everyone. A red and white card today, using the Creative Expressions Floral Silhouette stamp set.

I inked the carnation stamp using Distress Markers and stamped it three times. This was then die cut using a circle die, inking through the die with a Distress Ink pad around the outside edge. This was then matted onto a red layer of card die cut using the Spellbinders Picot Edge Circles die set.

The embossing folder highlighted in the background is the Couture Creations Cultivated embossing folder.

Happy crafting!

Blog Candy!

The number of followers on my blog is creeping up, so thank you to all of you for your support. I hope you are finding some inspiration from my work. 

When the number of followers reaches 100, I will draw a follower at random to win the following candy.

It is the highly sought after Couture Creations "Tied Together" embossing folder together with a bottle of Cosmic Shimmer "Vintage Plum" Pearlescent PVA.

Good luck everyone!


Sunday, 18 August 2013

Sun Kissed Fleur is just peachey!

Today's card is made using the Heartfelt Creations Sun Kissed Fleur range. Julia Watts is showcasing this range on Create & Craft today at 12-2pm (Tool Shed) and 5-6pm today. Julia was kind enough to ask if I could make some samples for these shows and this is one of them. 
The Sun Kissed Fleur Background PreCut stamp was stamped onto vellum using a Perfect Medium Clear pad and Cosmic Shimmer True White embossing powder. The two orange flowers were cut using the Sun Kissed Fleur die and coconut white card. I inked through the die with an orange Distress Ink pad and then shaped the petals before layering them up. 

It is a fabulous range of stamps and dies so I hope you manage to catch one of the shows, or the repeats.

Happy crafting!


Thursday, 15 August 2013

Blush Card and Micro Bead Flowers

I can't believe how the weeks fly by, so apologies for not blogging recently. Today's card features the blush coloured card chosen by Sue Wilson at Creative Expressions and the popular Tied Together embossing folder. The blush card has been used for the spiral flowers, the oval shaped layer and the base layer of the card. All other elements on the card were made using coconut white card.


I rounded the corners of the base layer of blush card, using a punch. The next layer also had the corners rounded. I used a piercing ruler and a piercing tool along the four sides. The third layer started off as a piece of coconut white card, again, with the corners rounded. I then repeat stamped this card using a stamp from the Creative Expressions "Valentine Set 2" stamp plate and a Tattered Rose Distress Ink pad. I then blended the Distress Ink around the edges.

I embossed a piece of blush card using the Couture Creations Tied Together embossing folder and then die cut this using a plain oval die from the Spellbinders Grand Ovals set. The decorative frame was cut from the same blush card, using a die from the Spellbinders Grand Decorative Ovals One set and a smaller sized die from the Grand Ovals set. I cut an assortment of small flowers from coconut white card using the Spellbinders Cherry Blossom die set and inked through the dies using the Tattered Rose Distress Ink pad. These were then glued onto the embossed card, as shown. 

The two sprays of leaves were die cut using the Spellbinders Foliage die set and then I inked through the die with the Tattered Rose Distress Ink. The leaves were then stamped using the same stamp used on the background. 

The flowers were made using the Spellbinders Spiral Blossom Four die. Double sided adhesive sheet was attached to some blush card before the flowers were die cut. The backing was then removed and micro beads were added to the adhesive. The flowers were then rolled, as usual, and secured with Cosmic Shimmer Dries Clear glue.

The sentiment was stamped onto coconut white card using a black archival ink pad. This was then die cut using Spellbinders Labels Twenty Five die set and I inked through the die, using the Tattered Rose Distress Ink pad.

The bow was tied using American Seam Binding in rose petal and flesh, finished off with a pink dazzler.

Now for some exciting news from Creative Expressions . . . . 

Would you like to be given fabulous Creative Expressions stamps every month absolutely free? Then we would love to hear from you...

We are currently looking to recruit new passionate crafters to join our 2013/14 Creative Expressions Design Team (CEDT) to make fabulous projects using our products and rubber stamp designs!

What’s in it for you?

There are some fantastic benefits to being a member of the Creative Expressions Design Team! As a member, you will:-
·         Receive a new set of Creative Expressions rubber stamps every month (absolutely free) as well as a selection of other crafting goodies to work with to create your weekly projects.
·         Receive a fantastic 25% discount on all products that Creative Expressions supply (this discount applies only to RRP of products and is only applicable when ordering from Creative Expressions directly).
·         Enjoy regular links to your blog through to the Creative Expressions website, blog and social media channels.
·         Receive a CEDT 2013/14 badge to display on your blog &/or website.
·         Have your creations showcased on the Creative Expressions website, marketing materials & social media channels.
·         Be joining a fantastic new innovative and exciting Design Team!

To find out more information on how to become part of the Creative Expressions Design Team, click on this link: http://blog.creative-expressions.uk.com/

The closing date for entries is Friday, 6
 September 2013 at 5pm GMT.

Good luck and we really look forward to seeing your projects!

Tuesday, 9 July 2013

His and Hers Masquerade

This card features one of the prettiest Spellbinders dies, which is the mask from the Venetian Accents.

The tags have been made using the Studio 490 Tag Topper Art Parts, which were painted with Distress Crackle Paint. A tag shape was cut to fit each of the tag toppers. One tag was heat embossed using Cosmic Shimmer Vintage Ultra Thick Vintage Blush embossing powder. The second tag was heat embossed using Tarnished Silver from the Cosmic Shimmer Vintage Ultra Thick embossing powder range.

The tags have been added to layers of blush card, a plain base, then a layer which has been pierced around the outside edge, then a third layer covering the bottom half of the card, which has been embossed using the Spellbinders Garden Lattice M-Bossabilities folder. This embossed piece has been topped with a die cut lace trim, using the Heartfelt Creations Decorative Lace Border die. 

The bows have been made by spritzing and scrunching two colours of seam binding ribbon and  making bows from these, then topping each with a dazzler.

The sentiments have been die cut using the Spellbinders Back to Basics Tags set and been tied to the bows with bakers twine.

Happy crafting!

Sunday, 7 July 2013

Gilded Poppies

Here is today's card . . . 

Quite a straightforward design, using milk coloured card and metallic vintage gold card, with gilding flakes. The poppies design is from the That Special Touch Poppies Mask. 

I sponged Cosmic Shimmer Flake & Glitter Glue through the mask using a piece of Cut 'n' Dry foam. The mask was then removed and gilding flakes were applied, before being brushed over with a large stencil brush to define the gilded image. The decorative frame was cut using Spellbinders Decorative Labels Eight and the standard Labels Eight dies. 

The photo doesn't show it very clearly but the milk layer of card was embossed using the Couture Creations Intrinsic Embossing Folder. 

The bow was made using a piece of champagne sheer wrinkled edge ribbon and a brown dazzler, both from Creative Expressions.

Happy crafting!

Friday, 5 July 2013

Summer has arrived!

It's a lovely sunny evening as I prepare this post, and looks like we are in for a beautiful weekend. I am going to a charity Garden Party tomorrow so the weather should help entice the crowds.

A twisted easel card today in blush . . . 


The card front has been embossed (but I have a confession - this is a sneaky peek at a new embossing folder design coming soon), before being die cut using the Spellbinders 5 x 7 Detailed Scallop die set. The embossed area has been highlighted with distress inks. I made two little slits with a craft knife, either side, to thread some seam binding ribbon through from the back, making a bow at the front.

The sentiment comes from the Creative Expressions Special Sentiments stamp set and has been die cut using the smallest die in the same 5 x 7 Detailed Scallop set.

The "stopper" for the easel has been made by die cutting a long piece of card using a die from the Spellbinders Parisian Accents set and seam binding ribbon has been threaded through this. Flowers have been added, made from spiral flower dies.The leaf sprays come from the Spellbinders Foliage Two die set.

The finishing touch was adding the butterfly.


This was die cut from an old drinks can, which I cut into, and was then coloured using alcohol inks. 

Happy crafting!

Tuesday, 2 July 2013

Pure Pleasure

Today's post shows a quick card made using an embossing folder.


Emboss a white piece of card using the Couture Creations Pure Pleasure embossing folder. Extend the pattern by moving the folder along the card and embossing for a second time. 

Using a blending tool, gently rub over the raised areas with Distress Inks.

Highlight the flower centres with glitter or a glitter glue. 

Die cut the butterfly embellishment using Spellbinders Les Papillions die set.

Stamp the sentiment using the Creative Expressions Special Sentiments stamp set.

Happy crafting!

Monday, 1 July 2013

Polished Silk Daisies

Today's card features the Cosmic Shimmer Polished Silk Glitters and Foundations papers.


Cover a piece of coconut white card with a sheet of adhesive film. The film has protective backing sheets either side of the adhesive, one which feels more like paper and the other which is more shiny. It usually doesn't matter which side you peel off to stick to the card but this time you need to make sure the shiny backing is left on the adhesive and the backing sheet on the opposite side is removed. 

Die cut an assortment of flowers using the Spellbinders Jewelled Flowers die set, from one end of the card. Peel off the shiny protective backing layer from the adhesive on one of the die cut flowers (keep this shiny backing to one side) and pour Silver Chrome polished silk glitter on. Tap off the excess and pour it back into the pot. Polish the glitter with your finger for a few seconds. Repeat this process with the other die cut flowers using Western Blue and Penny Copper polished silk glitters. 

Trim a rectangle from the remaining piece of card. Peel off the backing paper and place the shiny die cut flowers you put to one side earlier onto the sticky adhesive. Pour Silver Chrome polished silk glitter onto the card and polish as with the flowers earlier. 

Remove one or two of the shiny flowers and pour Western Blue polished silk glitter onto the card. Polish this colour into the card. Remove the remaining shiny flowers and pour Penny Copper polished silk glitter onto the card and polish as before. 

Layer this onto white card, and co-ordinating backing papers, as shown.

Trim with a bow and your message then add a few dazzlers to the flower centres.

Happy crafting!

Saturday, 29 June 2013

Just for Lesley!

It is thanks to Lesley that I have been given the push to post more designs on this blog. I hope you enjoy seeing them.

Here is today's card.


This is one of the samples I made for Julia Watts' recent Creative Expressions shows on Create & Craft, for their Christmas Event. Sorry the picture is a bit blurry.

The base of the card was made using two layers of Rich Plum card, with the smaller of the two being pierced all around the outside edge.

The Metallic Vintage Gold layer was embossed using the Couture Creations Baubles & Baubles embossing folder. The pattern was extended to fill the whole of the gold layer. The strip of plum card was embossed using the Couture Creations Message In A Tree embossing folder. I rubbed over this with Creative Expressions Vintage Golden Green metallic gilding wax to highlight the design. 

The sentiment has been stamped using the Creative Expressions Winter Greetings stamp set. I stamped using Perfect Medium and then applied Cosmic Shimmer Detail Black embossing powder.

Now for the bauble toppers! I love these!!! They have been stamped from a new stamp range at Creative Expressions which are already cut out and mounted onto cling foam. This one is called Beaded Bauble. It has been designed to fit the Spellbinders Heirloom Ornaments (2010) die set but if you don't have these dies it is quite easy to cut out by hand.

I stamped them onto the plum card using Perfect Medium then added Cosmic Shimmer Detail Gold embossing powder. Once these had been cut out I added beads of Cosmic Shimmer Vintage Plum Pearlescent PVA, as shown. I strung a few seed beads together to hang the baubles from. 

More to follow soon!

Happy crafting! 

Wednesday, 24 April 2013

Flower Box and Butterflies

To start today's card I die cut a piece of white card using the Spellbinders 5 x 7 Elegant Labels Four die set. I stamped two of the butterflies from the Elegant Butterfly clear stamp set in the top half of the die cut card. I then stamped the same images again on another piece of white card and then cut them out. These were layered up onto the corresponding stamped images.

The Spellbinders Die D-Lites Flower Box die was used with black card and this was glued on the lower half of the white card.


I cut a mat from Teal card and embossed this using the Couture Creations Crazy Daisy embossing folder. 

The final mats were cut from black and white card.

Happy crafting!

Tuesday, 23 April 2013

Floral Border with Butterflies

A dramatic red and black card today, using the Spellbinders Floral Border Die D-Lites die.


The background was stamped using the small butterfly and a flower from the Elegant Butterfly Clear Stamp Set. The small butterfly, together with the large butterfly from the set, were then stamped again on another piece of red card and this time embossed with clear embossing powder, before being cut out. The two butterflies were then shaped slightly and glued onto the stamped background. The butterflies' trails were added by trimming one of the self-adhesive black pearl swirls. 

The flower border was die cut from a piece of black card. 3mm self-adhesive black pearls were then added to the flower centres.

The card was finished by adding alternating mats of black, red and black card.

Happy crafting!


Monday, 22 April 2013

Floral Corner One with Daffodil

I have used quite a few Spellbinders dies on this card, mixing things up a bit.


The daffodil stamp and the message come from one of the new Creative Expressions "Singles" stamps, which come pre-cut and mounted onto cushion cling. A lot, like this one, also come with a free sentiment. They retail at £4.99. I stamped the image and sentiment using Jet Black Archival ink, onto milk coloured card. I then embossed this with the Cosmic Shimmer detail clear embossing powder from Creative Expressions. I coloured the flower with Distress Markers and a water brush.

I die cut the daffodil using the beautiful Spellbinders Opulent Ovals die set. The sentiment was die cut using one of the dies from the Spellbinders 5 x 7 Elegant Labels Four set. I also used the new Floral Corner One Die D-Lites die set to decorate two corners of the mat under the daffodil image. You get a flower die separate to the corner die, and I used this to decorate the sentiment tag. The ribbon threaded through the tag is Champagne Sheer Wrinkled Edge ribbon.

The metal corners I have used are the Creative Expressions Art Deco Metal Corner Embellishments.

The mat under the daffodil image was cut from a piece of Vintage Gold card. This was then embossed using the Moroccan Mask from That Special Touch.

Happy crafting!

Monday, 8 April 2013

And the winners are . . . .

The Creative Expressions blog hop prize draw winners have now been announced. Click here to find out if you were one of the lucky ones and to claim your prize!

Vines of Passion

Here is another sample from the recent Pick of the Week shows on Create and Craft.


This is a really pretty set (Spellbinders Die D-Lite Vines of Passion) which could be used in so many combinations.

Happy crafting!


Saturday, 6 April 2013

Bonsai Tree

If you saw my previous post, this shows the Bonsai Tree in the conventional way.


Happy crafting!


Friday, 5 April 2013

Can you see what it is yet?

This was another sample made for the recent Pick of the Week shows on Create and Craft.


It is actually using the Spellbinders Bonsai Tree Die D-Lite shape. I cut it four times from some red card and placed them in the four corners of a white square of card, to make the topper.

Happy crafting!


Wednesday, 3 April 2013

Creative Expressions Sheer Inspiration Blog Hop

Welcome to everyone taking part in the Sheer Inspiration Blog Hop, if you've come here from Gillian Simson's blog you're in the right place. 

My project, using a selection from the Creative Expressions 5-yard ribbon reels, is a Ribbon Wreath.

The base is a polystyrene ring which I bought at my local craft shop for about £3. You also need some dressmakers pins and your ribbon. I chose to use Silky Crush Ribbon in cream, champagne and brown, plus the Sheer Wrinkled Edge Ribbon in champagne and Grosgrain Stripe Ribbon in brown and ivory stripe.

The first thing I did was tie a hanging loop around the ring using some of the ribbon. The remaining ribbon needs to be cut into lengths of approximately 4-5", so this would be an ideal way of using up your off-cuts and ribbon scraps. 


Curl each piece of ribbon into a circle shape, as shown, and then pin through the overlapping part and into the polystyrene ring. Continue until the polystyrene can no longer be seen.


This colourway was used to make a Decoration celebrating a Golden Anniversary, but you could easily pull out some of the colours and replace with say red and green to recycle your ribbon wreath for Christmas, or use multicolours for a Birthday decoration.

Don't forget to check DT Member Kim Dellow's blog on Friday for a special surprise.

Your next blog in the hop is Shary Nettleship.

Here is a list of everyone involved in the hop:

1. Tracy Evans
2. Trish Latimer
3. Jean Gursoy
6. Tracey Laughton

9. Kim Dellow   (don't forget to check Kim's blog for a special surprise from 10am on Friday 5 April 2013).


Tuesday, 2 April 2013

Large Birdcage

If any of you were lucky enough to get some of the Spellbinders Die D-Lites, from the recent Pick of the Week shows on Create and Craft, you may recognise this card. I was delighted to be asked to make some of the samples for the shows and this was one of them. 


The Die D-Lite is called Bird Cage 2 (S3-203) and I cut this from the Vintage Gold card from Creative Expressions. The bird and the branch stamps come from the Creative Expressions "Birds" stamp plate. The decorative frame was cut using the new Spellbinders 5 x 7 set Elegant Labels Four.  

Keep an eye out tomorrow for the Creative Expressions blog hop, for the chance to win some great prizes.

Happy crafting!

Sunday, 31 March 2013

Easter Greetings

Hope you are all having a great Easter weekend. 

Here is my card to wish you all  "Easter Greetings".


It uses one of the new Creative Expressions pre-cut Single Stamps - "Chirpy Chick" (UMS022). 

This range of single stamps are already mounted onto umount cling cushion and cut out for you, ready to get crafting straight away. Many of the single stamps also come with a free sentiment stamp, which is also mounted onto umount cling cushion and cut out for immediate use.

The Spellbinders die sets I used to make the easel card, mats and layers were Grand Circles (LF-114), Grand  Decorative Circles One (LF-015) and Stately Circles (S4-388).

The centre image was stamped in black Archival ink and then coloured using Distress Markers. 

The paler chicks in the background were stamped by colouring the stamp direct with the same Distress Marker colours, and then pulling the colours out using a water brush.

LOOK OUT FOR AN EXCITING BLOG POST ON WEDNESDAY 3 APRIL 2013
for the chance to win some great prizes!


Happy Crafting!


Saturday, 9 March 2013

What no die cutting!

Something a bit different from me today, using stamps and inks but no die cutting.


The gorgeous rose design is from the Creative Expressions stamp set called "Floral Silhouette". I inked up the stamp using Distress Markers and stamped the image onto white card. Using the corresponding colours in the Distress Ink pads, I blended ink to frame the image and then inked the border of the mat beneath.

The bow is made from the Creative Expressions Sheer Wrinkled Edge ribbon and has a circle dazzler in the centre.


Happy crafting!

Thursday, 7 March 2013

Crazy Daisy

Today's card has been made using a Couture Creations embossing folder called Crazy Daisy. It's a bit smaller than their usual folders, but has a very pretty design on it. 


The folder was inked up using a Clear Perfect Medium pad, on the side of the folder which has the background most prominent. The white card was embossed in the usual way and then clear embossing powder was applied to the card and heat embossed. Picked Raspberry and Salty Ocean Distress Inks were then blended over the image. Where the clear embossing was in the background, the ink did not settle, making the raised flowers pop. 

The white flowers were made using the Spellbinders Bitty Blossoms die set, inked with Picked Raspberry Distress Ink. The blue flowers were made from pale blue card. Two circles of card were cut into spiral shapes. The spirals were then wound to form the blue flowers. The edges of these flowers were inked using the Salty Ocean Distress Ink pad.

Happy crafting!


Wednesday, 27 February 2013

Life isn't about finding yourself . . .

. . . it's about creating yourself


This card features one of the characters and a sentiment from the Creative Expressions "Steampunk Sirens" stamp set. The kraft papers are from Canvas Home Basics and the bow has been made using two colours of Amercian Seam Binding ribbon with a brown Dazzler.

Happy crafting!

Monday, 25 February 2013

Yellow Tulips

Another card using one of my favourite stamp sets from Creative Expressions, "Floral Silhouette".


I coloured the tulips stamp with Distress Markers. The gold frame was die cut using the Spellbinders Resplendant Rectangles. 

Happy crafting!